Guide to Changing Your Own Oil

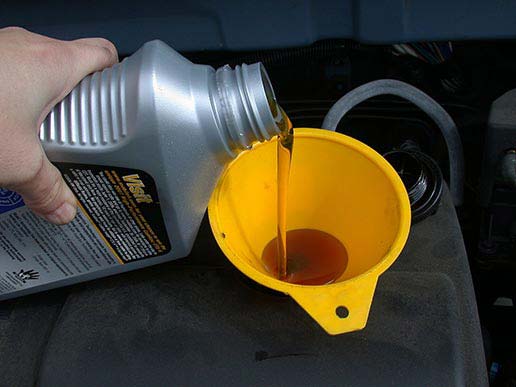
Giving your car an oil change is something you can do yourself. IMAGE CREDIT: Dvortygirl
Getting Ready to Change Your Oil
So, you’ve checked your oil, and it’s time for a change. You have a few options: most car dealerships will perform any basic maintenance for you – sometimes they offer services for free if your car is under warranty – or you can take it to a third-party, such as Jiffy Lube. Generally speaking, these oil changes can run you around $50.
If you want to save some money, and you don’t mind getting your hands dirty (literally), you can do it yourself for a lot cheaper.
Step 1: Setup and Draining the Oil
From a hard, level surface, elevate your car (use ramps or a lift or a properly-placed jack). Let the car idle a few minutes, to warm up the oil (warmed oil drains faster). Next, pop the hood, find the oil cap, and open it. This is where you will pour the new oil (not yet!), and opening it now allows the old oil to drain faster.
Look under the car, and find the oil pan. It’s a flat metal pan that’s close to the engine. There should be some sort of plug or bolt toward the bottom. Place your oil pan directly underneath the plug, and have some newspapers underneath that, in case of any drips.
Now you’re ready to pull the oil plug (use the socket wrench). Check the gasket, to see if it needs replacing. Once the plug is off, guess what? Oil comes out. You may get messy (honestly, you will get messy). Catch the oil in the pan. Now, we wait.
Step 2: Changing the Oil Filter
After several minutes, the oil will have drained from your car. Replace the plug – hand tighten at first, then with the socket. Don’t forget the gasket!
Look around under the car for your oil filter. It’s a cylinder that’s usually colored blue or white. There isn’t really a universal position for them, so look to the new oil filter you bought to replace the old one as a guide. Once you’ve found it, unscrew the old one from the assembly. Twist it slowly, counter-clockwise. You should be able to do this with your hand, but use a rag if you need additional grip.
Pull it off, and be sure to also pull the rubber gasket ring as well. If it’s stuck on the housing, peel it off. It’s okay, your hands are already dirty from the oil plug.
Before you attach the new filter: dip your finger in some of the excess oil from the old filter. Smear it around the gasket ring of the new filter to lubricate it, and create a tight seal. Once you’ve lubricated the new filter, carefully screw it on. Read the package for specific tightening instructions.
Step 3: Adding the New Oil
After the new filter is attached, and you’ve plugged up the oil pan, you can add in the new oil. Double check the amount and weight/kind against your owner’s manual, and carefully pour it all in. Replace the oil cap when finished. Clean up any excess that may have dripped or spilled.
You’re ready to turn your engine on. Check the car’s oil pressure light, and with your car in park or neutral, look underneath for any drips or leaks. Let the engine run for a moment to regain proper oil pressure.
Step 4: Disposing of the Old Oil
Of course, you can’t simply throw away the dirty oil that drained out of your car, it’s an environmental hazard. Pour it into a permanent container (an old milk jug will do), label it, and take it to a designated collection site in your area. You can typically get this info from the place you bought the new oil and filter.
Finally, reset your mileage indicator, so that you will know when it’s time to change your oil.


